Transplanting chillies correctly


Transplanting chillies correctly
Transplant (separate) your chili plants with little effort. Tips and Tricks.
There are many rumours around transplanting, such as that it is very difficult, time consuming and only for experts. That’s not true. Transplanting, the separating of small plants, only makes sense if you want to cultivate a large number of plants. Hobby chili cultivators with more than 10 plants per variety should not sow the seeds individually in pots, rather in groups. After approx. 3-4 weeks the small chili plants should be transplanted (separated) and placed in individual pots, growblocks or pressed earth blocks.
What do I need for transplanting or for chili cultivation and the subsequent transplanting?
You will need a propagator tray, in our case an Indoor Greenhouse and potting soil. A heating pad is optional but recommended. For the subsequent transplanting (separating) you will need a dibber, good potting soil, and several pots. We prefer to use square pots, as they are very space-saving. You can obtain all the necessary materials from us in our Shop.
Step by step approach
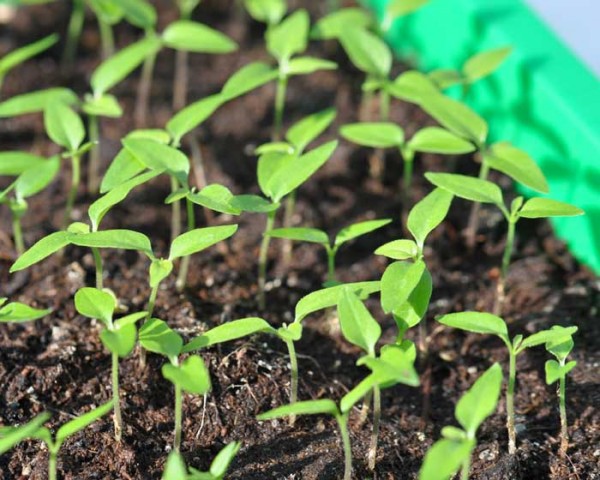
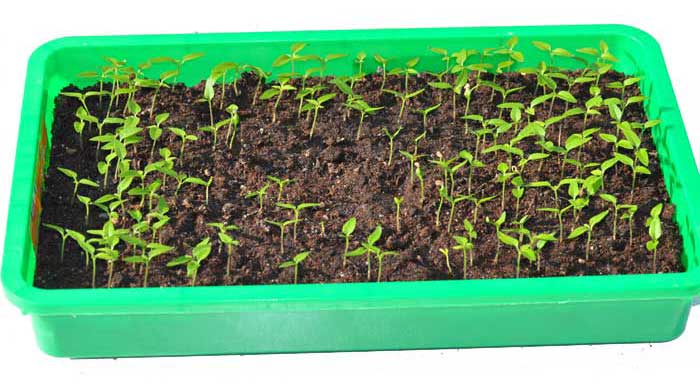
Step 1: Put a 2-3 cm high amount of potting soil in the indoor greenhouse and distribute it evenly. Water the soil carefully so that it is damp. Distribute the chili seeds evenly on the potting soil, and add another centimetre of potting soil on top of the seeds. Now you have to be very careful to dampen the earth without washing everything away. In our case, 95% of the Jolokia seeds germinated after 1-2 weeks - also thanks to the heating mat. After a total of 4 weeks, the 125 Jolokia plants are ready to be transplanted.
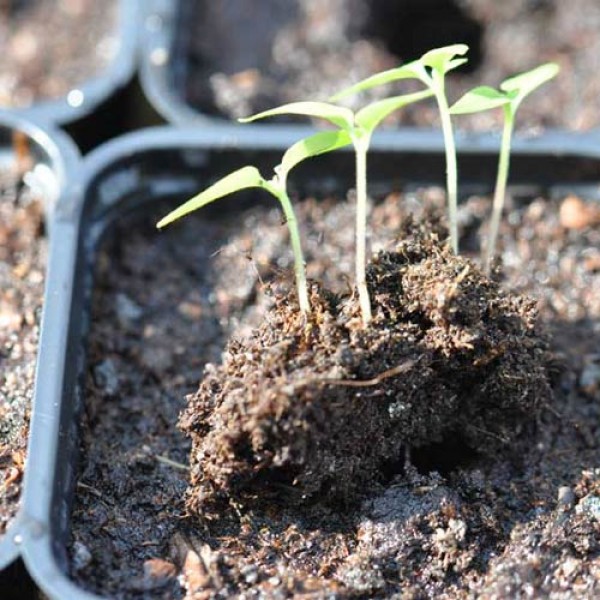
The plants have approx. 4 cm long roots, and the first real leaf pair is gradually beginning to manifest. The first non-real leaf pair is the seed leaves. In comparison to other varieties, Jolokia chillies grow relatively slowly, while other types such as the fast-growing Inferno chillies are already 7-8 cm large after 4 weeks. It is only important that the plant can be removed from the potting soil and replanted without damage.

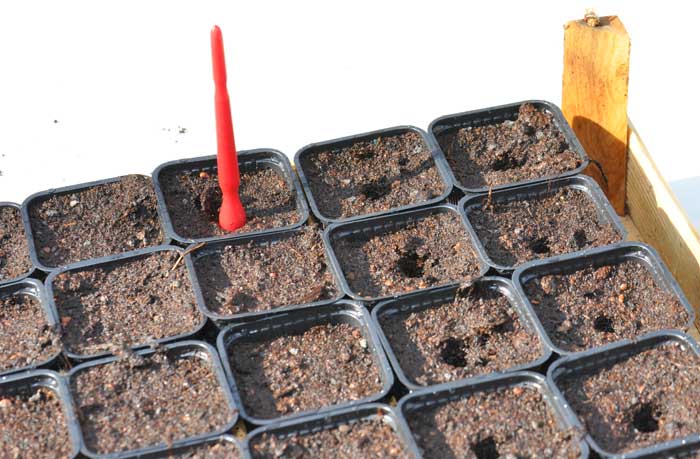
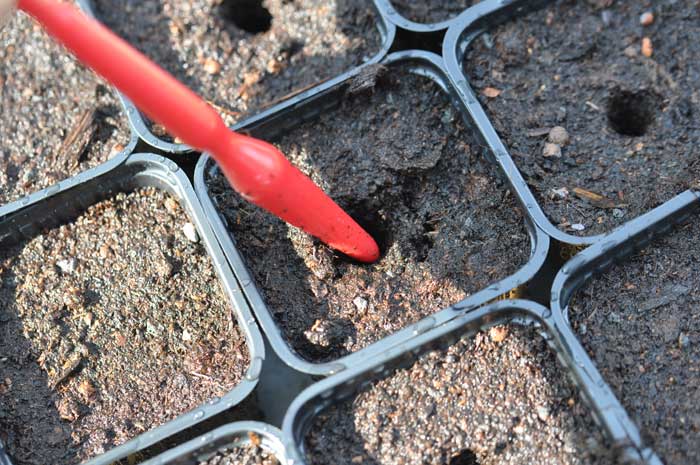
Step 2: The square pots of 7 cm in diameter and height are filled with good potting soil and are well watered. It is then best to arrange them in rows on a plastic or wooden surface. With the thick side of the dibber, 1.5 to 2 cm large holes should be made, depending on the side of the chili plants, until the bottom of the pots. Our gardener has the following tip for us: If you press the soil relatively firmly, this promotes root growth.
Step 3: Now carefully take several chili plants with the soil from the indoor greenhouse in one hand, and separate the individual plants. Here you must be very careful, but with time this work becomes quicker and easier.
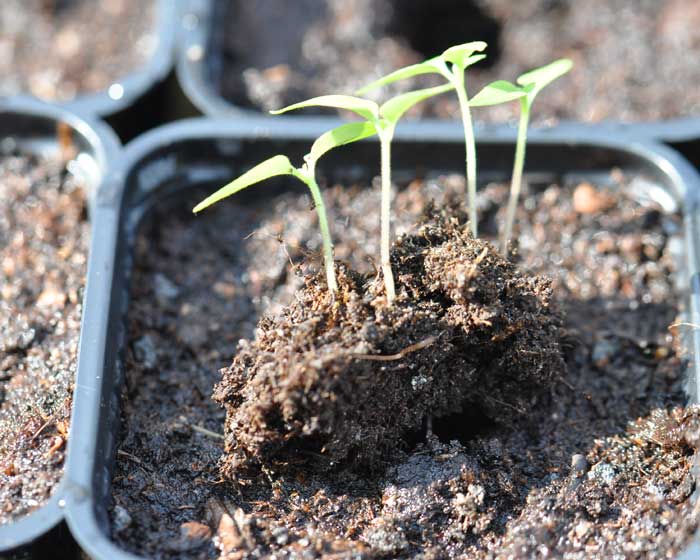
Step 4: The plants should then be placed into the pre-made holes and pressed down with the dibber. The rounded end of the dibber should press down on the small root bales of the chili plants. The chillies can be placed into the soil as far up as their seed leaves, as will they form further roots on the stem and the chillies will grow in a more stable manner.

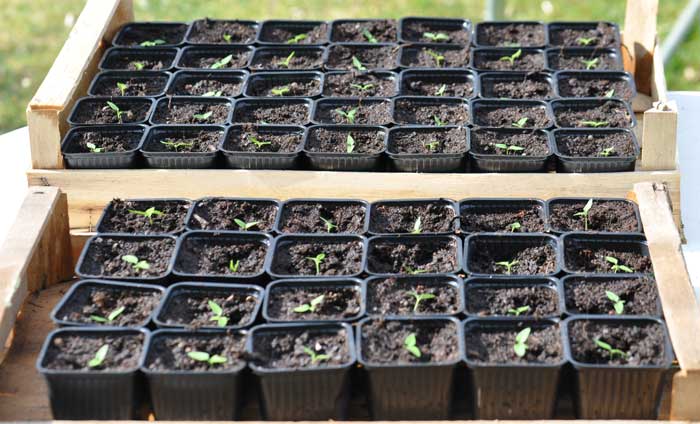
Transplanting is simple and, with some skill, should be easy to learn. The 125 Jolokia plants are still indoors and will go into the greenhouse next week. What will you do with so many plants, some may ask?
This is a test for the chili plant shipments in the 2014 season. If our tests with respect to storage, commissioning and shipping are positive, we will increase our plant shipments in 2015.
Update 13.05.2014: The Jolokia plants are looking good, and in a few weeks they can be sold as a test run.
Manufacturer
Name: | Chili-Food-Wissen |
Address: |


 Dibber
  20 Square Plastic Pots 7 cm
  Plant Labels 20 pieces


